


"Warning": This tutorial has not been tested by anyone else than me, it's my first, so I can't assure it's 100% "crafter-friendly", so if you need any help or have a question, don't doubt to let me know, and also if you have made them, I'd love to see pics! Thanks for stopping by!
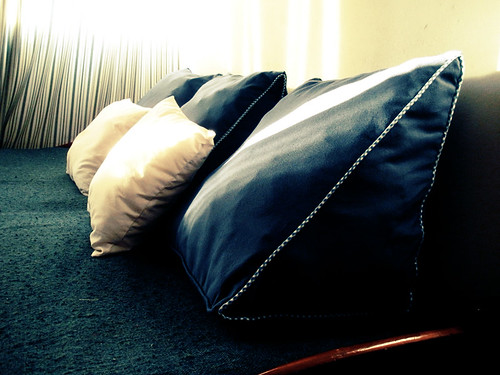
Last year I posted a drawing I made about how to calculate how much fabric I'd need to make triangle cushions... why triangle?... well the idea came up with the need of something soft to "sit on", my couch doesn't have a... a... (insert word that describes the back part of it) well "that"... so sitting on it would be very uncomfortable. So the idea of a right triangle hit on and this year, I got an old mattress and decided to recycle it and test my idea which I'm going to share now so people don't hurt their backs anymore :p.
Materials:
 For 3 cushions I've used 1.80 m (a yard) of fabric (I think it's upholstery fabric) it was cheap... and the right color so I didn't care what the name was :p
For one cushion:
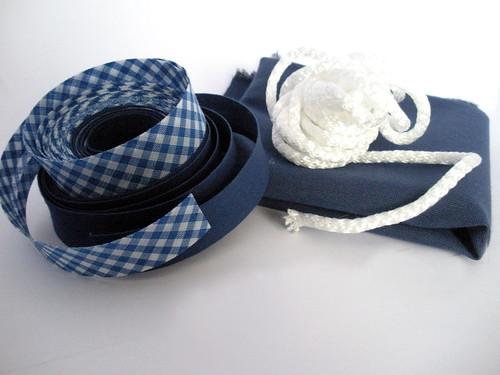
· 1,56 meter of blue bias tape,
· 2,45 meters of blue and white tartan bias tape for the triangular sides,
· about 4 meters of cord....
Stuffing:
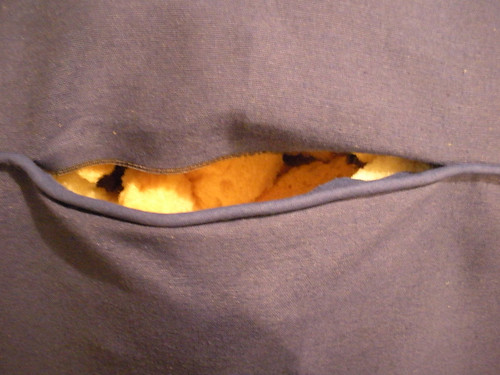
It was made of an old mattress that nobody wanted... I cut it into pieces of about the size of my hand and the longest side, and then those strips were cut into smaller pieces like pictured.
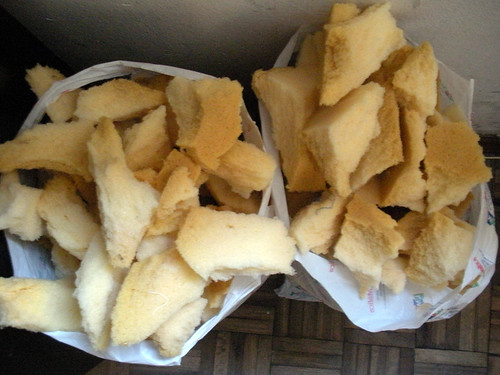
Note: It's a good activity to do while being mad... I assure you will feel better :p
oh and do not use black clothes nor anything made of wool while cutting the material or you'll be all "snowed" because of the static .
Also it'd be a good idea to make the cushion in a cheap fabric, stuff it and then make the cushions in the desired fabric and close it with Velcro so it can be washed.
1. Cutting the fabric
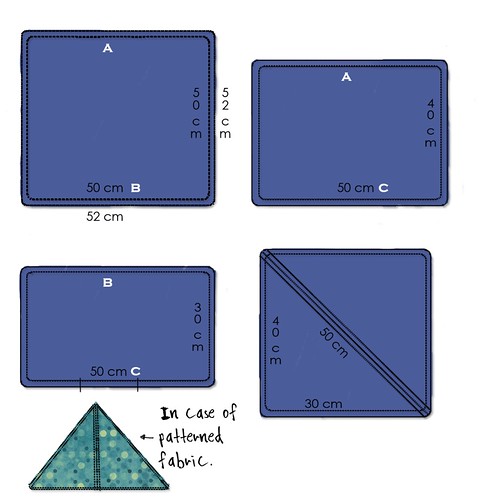
For one cushion:
· A square of 50x50 cm,
· a rectangle of 50x40 cm,
· a rectangle of 50x30 cm,
· For the triangles for the sides, I drew a triangle of 40x30 cm and the hypotenuse of 50 cm and then left 1cm of sewing allowance, my fabric doesn't have a right side so I just drew this kind of rectangle to cut 2 triangles and use less fabric but if you have a patterned fabric or a fabric with a right side, draw it like the green square on the corner.
Note: For sewing allowance, I left 1 cm around in every piece.
2. About the piping
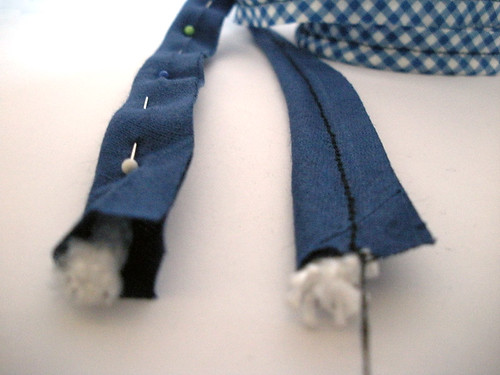
I made mine because I don't even know how is it called in Spanish, also I found this bias tape that was just the right color.
For one cushion cut, in both bias tape and cord, 3 strips of 52 cm each and 2 of about 1.24 cm.each.
Open the bias tape and put the cord inside, pin close to the cord and sew each strip.
I had help to make the piping from: Prudent baby and Make it and love it and also from another blog... it was a video with a woman talking with sticks and pictures of heads glued on them, it was funny, too bad I can't find it now :/
3. Sewing the piping
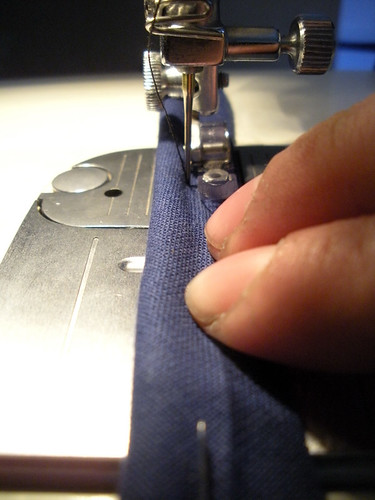
Sew with zipper foot.
Remove the pins as you go and mark with your fingers where the cord is so it's easier to sew.
4. Sewing the piping to the body of the cushion
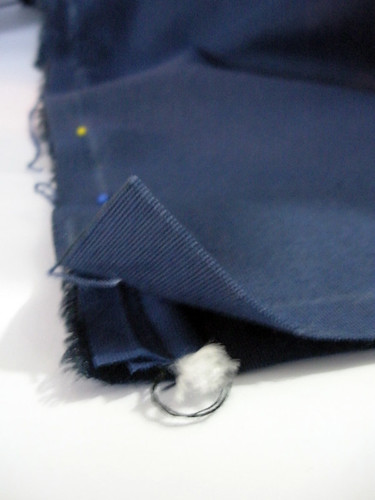
Face right sides of the pieces of the "body" and put the piping inside lining up raw edges, pin next to the cord and sew with zipper foot.
Join A with A, B with B and apply the piping only in one side of C
If you want you can make a zig zag stitch on the edges so they don't fray.

You will end up with a long piece of fabric and here it shows how the piping is going to be sewn only in one side that will be the back and lower side of the cushion (C)
5. Sewing the piping to the triangles of the sides

Pin the piping in place, again, line up raw edges and on the corners or angles make a cut so you can bend the piping and keep pinning.

Sew in place and when you reach where you began sewing or pinning, open the seam of one end and cut a bit the cord, insert one end into the other, pin and sew.
6. The final (or not) step: Sewing the triangles to the body
Probably the trickiest part but with patience it can be done.
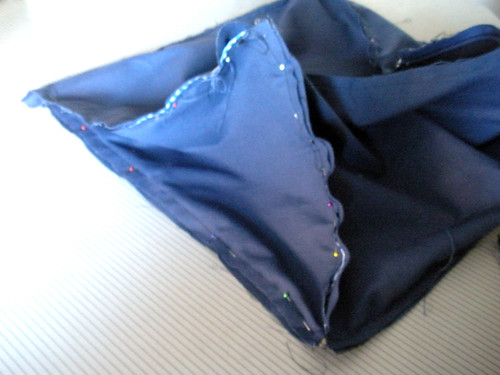
Pin the triangle into the opening, matching the 30 cm side of the triangle with the 30 cm one of the rectangle (B-C) and so on. On the corners try to kind of tuck in the triangle "angle" and once sewn cut the extra fabric.
Sew the C side leaving a gap in the middle to turn the cushion right side out and fill.
7, Filling and closing
Stuff it and hand sew the gap with invisible stitch.
And.... it's done :D


I really love this! I might make them to use with my new daybed I just learned how to make today!
ReplyDeleteThanks a lot!, I'm glad you like it! :)
ReplyDeleteNice cushions! I never thought about making triangle cushions before, but it's a great idea.
ReplyDelete