Tuesday, August 31

212 Randomness and yesterday's sweetness

The other day I was touching up one of my posts (I can't help it) and saw this:

I don't really trust these things, some of them "catch" the IPs, others if you saw a picture on google images and so on, I think I'm going to get rid of these someday... but I really like the moon and the flags, I wonder how you called a person who likes countries and languages? Anyways...
Nice... 212 Polish views (I bet most of them are you mój przyjaciółka :p)... and tomorrow 1st... I'm going to be 22... yeah, random!!.

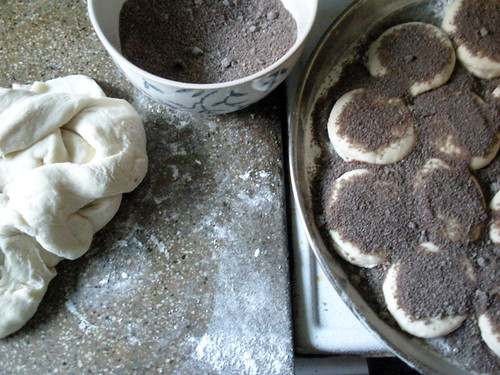
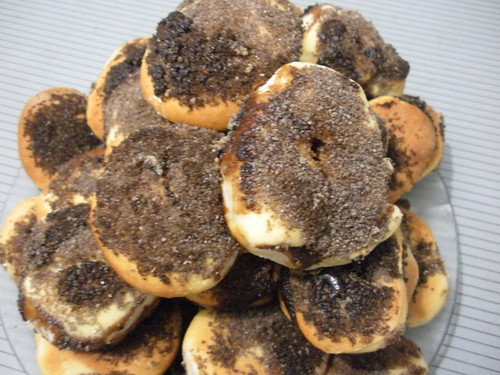
And about the sweetness... I baked tortas negras yesterday, I really enjoyed kneading, I used to do it a lot when I was younger, not for eating though, just to make a mess in the kitchen... sorry mom.

Tortas negras

Tortas negras


Photobucket

Saturday, August 28

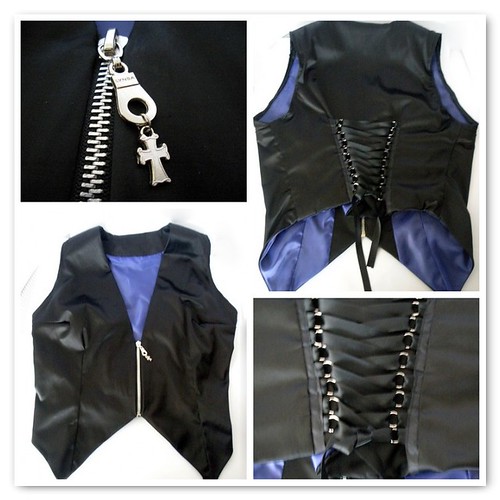
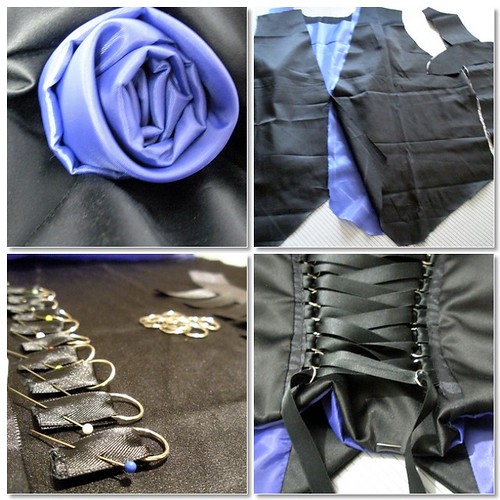
Corseted vest!

Corseted vest

Wooho I finished this the other day, I'm so happy with the results... although it has lots of flaws but it was going to happen since it's my first try.

Mosaic Corseted Vest


Some things I need to keep leveling up:
· Cutting the fabric, I try to be neat but it seems that all my fabric scissors are useless, I've been thinking about buying a rotary cutter, I'd so LOVE to have one.
· Sewing stupid satin bias tape, yes... we met again, I had to use this tape to finish the armholes... since they are obviously round and the fabric wrinkled when I first try to finish them, my teacher told me the satin bias tape would stretch and finish it neatly.

Points to bare in mind for next time:
· The armholes were too wide on the front so I need to modify the pattern.
· The vest was also too big on the sides.
· Use thiner interfacing, which I kind saw it coming but I couldn't find other.
· Change the "homemade ribbon metal ring thingy" for pieces of fabric with eyelets.
· Go back to the basics! yeah, it's incredible, when I was about to give up finishing the armholes we had a black out and I was like, well I'll finish the "gapwhereIturneditrightsideout" and then I just went and finish the ends of the satin bias tape by hand, I wish I knew it before I sew the armholes with the sewing machine, I'd have done it entirely by hand but the thing with this satin bias tape, is that it is a pain to unpick so I left it that way.

About my inspiration, I totally love Sn@tch (virtual shop in a game I (used to) play called Second Life) and Lip Service, the first one I found it by chance and I was very hooked from the first time, it was like someone has made real all the ideas I have in mind or things I would totally like. And about the second one, I don't really remember how I end up knowing about it but it happens more or less the same, I really like some of their stuff, too bad I can't buy them though (It's going to be one of the first places I'm going to visit when I go to the states)
It's kind of funny but they both have the same looks sometimes, I'm not sure if the designers are just one but anyways... they truly inspire me.
Photobucket

I finished my pattern making course!

Well, actually a week ago but I didn't want to make a post without pics...
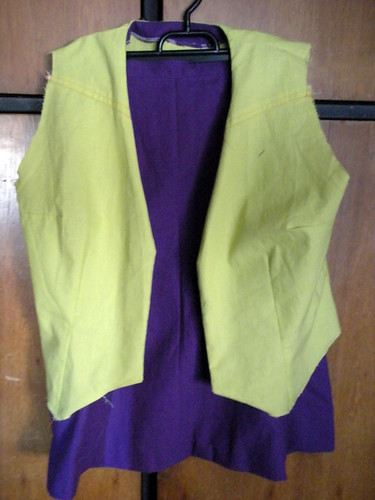
So, first we learned how to make skirts (I made a post when I was about to), then how to make vests and here a pic of what I've done. The skirt is made with kind of godets.
DSCN29351

It's obvious it's ONLY for practice, the fabric is cheap and I chose those colors only for sight sake :p, and also the vest is not finished, I don't think I'm going to unless I need this for a costume or something.
In those 2 garments I learned how to sew a zipper, invisible stitch, waistband among other things.
The teacher asked us to create designs for a vest for us, so I did it, he loved them, specially the corseted ones, I've not scan them though but we had to make them real so I'm going to make a post about it later.
Then we moved to shirts and learned how to make collars, sleeves and cuffs and finally a pant and then a dress.

DSCN29381

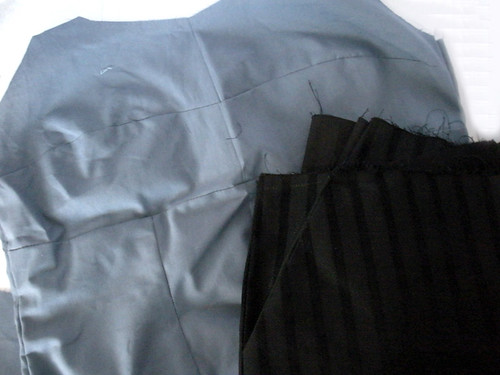
I chose this pretty striped black fabric for my pants since I wanted to make something I'd wear, the fabric was very affordable and did I meantion it is striped?, it's a denim corduroy kind of heavy but it's for winter, I have trouble with the crotch though so I'll have to look for a solution on the net one of these days. Good things I remark is that I learned how to make pockets and also sewing the zipper, which I kind of forgot now :p
About the dress, I have this beautiful black satin modal top, I love it but since my chest is too... big it's kind of too revealing so I have to wear it with a kind of bandeau underneath, I still love the shape so I told my teacher I wanted something like it, so he taught me how to do it, the transformation was easier than I thought. And I'm testing the pattern on this cheap cloth before actually going to the fabric I have in mind.
So this is more or less what I've done on the course, now I kind of miss going there but it was going to finish someday.

Also I found this great blog in Spanish, El costurero de Stella, she teaches pattern making and other stuff about sewing,I had the exact same idea of her blog, start to explain the process of pattern making, I love that because I've seen other blogs that only teach the sewing part, which is very important, but you have to buy the pattern or already know how to draw it from scratch so I'm really happy I found Stella, I wish she would have started to write it in English too, I'm starting to rust since I'm not reading crafts blogs everyday so I'm kind of forgetting English sewing terms, I wanted to say "vista" and "cartera", I just can't find the words in my head... oh well... they will come into my mind eventually.

Photobucket

Friday, August 20

Völkerball Richard's coat

So I'm watching Rammstein's Völkerball dvd and I can't help myself... I want a coat like this... so bad!

Shame I can't find more detailed pics... and while I was looking for pics I noticed I'm not the only one who thinks this coat is to drool for. And by the way I'm certainly not a groupie, I'm not the type: "omg XD he touched my hand!!", "he looked at me, HE looked at ME!!!" or "I love you, take me!!!!" or scream when they... do something lol.
Some musicians are hot, hmm Richard is kind of handsome... but it's not like he is going to notice me in all the screaming and sweating mass and propose me, even if he would, I'd say no, I don't like men who wear more make-up and use more hair products than me :)

Photobucket

Sunday, August 15

Tutorial: Triangle Cushions!

Triangle Cushions
 
Triangle Cushions

"Warning": This tutorial has not been tested by anyone else than me, it's my first, so I can't assure it's 100% "crafter-friendly", so if you need any help or have a question, don't doubt to let me know, and also if you have made them, I'd love to see pics! Thanks for stopping by!

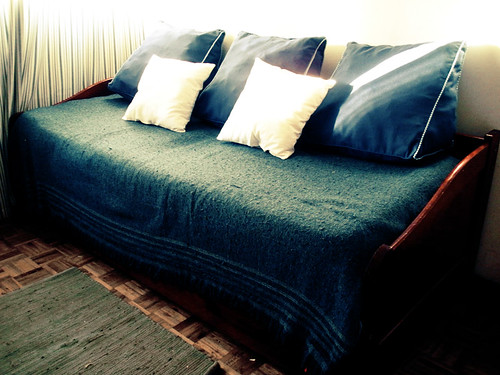
Last year I posted a drawing I made about how to calculate how much fabric I'd need to make triangle cushions... why triangle?... well the idea came up with the need of something soft to "sit on", my couch doesn't have a... a... (insert word that describes the back part of it) well "that"... so sitting on it would be very uncomfortable. So the idea of a right triangle hit on and this year, I got an old mattress and decided to recycle it and test my idea which I'm going to share now so people don't hurt their backs anymore :p.

Materials:
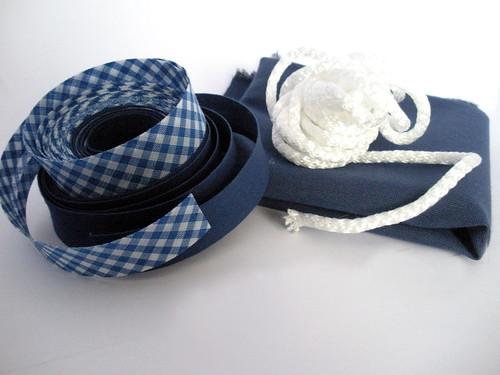
Materials For 3 cushions I've used 1.80 m (a yard) of fabric (I think it's upholstery fabric) it was cheap... and the right color so I didn't care what the name was :p
For one cushion:
· 1,56 meter of blue bias tape,
· 2,45 meters of blue and white tartan bias tape for the triangular sides,
· about 4 meters of cord....
Stuffing:
It was made of an old mattress that nobody wanted... I cut it into pieces of about the size of my hand and the longest side, and then those strips were cut into smaller pieces like pictured.
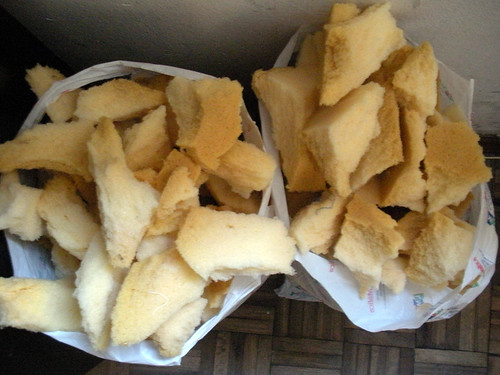
The stuffing
Note: It's a good activity to do while being mad... I assure you will feel better :p
oh and do not use black clothes nor anything made of wool while cutting the material or you'll be all "snowed" because of the static .


Also it'd be a good idea to make the cushion in a cheap fabric, stuff it and then make the cushions in the desired fabric and close it with Velcro so it can be washed.


1. Cutting the fabric
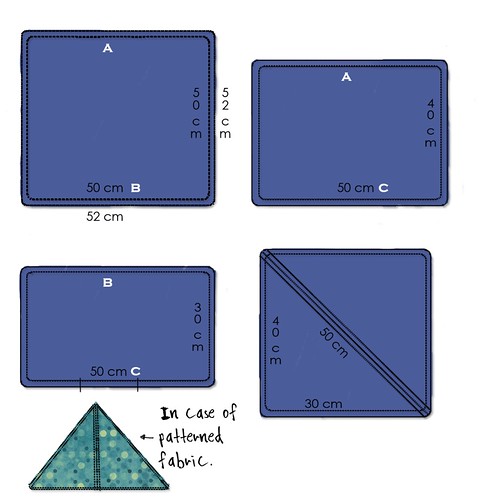
Pieces to cut

For one cushion:
· A square of 50x50 cm,
· a rectangle of 50x40 cm,
· a rectangle of  50x30 cm,
· For the triangles for the sides, I drew a triangle of 40x30 cm and the hypotenuse of 50 cm and then left 1cm of sewing allowance, my fabric doesn't have a right side so I just drew this kind of rectangle to cut 2 triangles and use less fabric but if you have a patterned fabric or a fabric with a right side, draw it like the green square on the corner.

Note: For sewing allowance, I left 1 cm around in every piece.

2. About the piping
Making the pipping

I made mine because I don't even know how is it called in Spanish, also I found this bias tape that was just the right color.
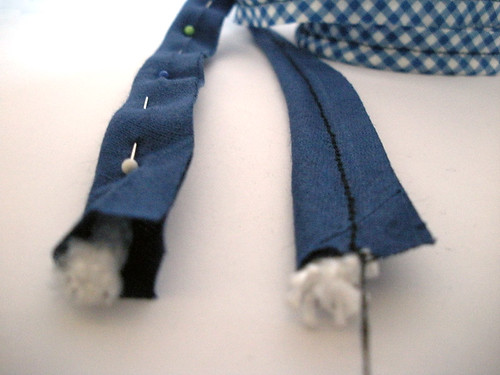
For one cushion cut, in both bias tape and cord, 3 strips of 52 cm each and 2 of about  1.24 cm.each.
Open the bias tape and put the cord inside, pin close to the cord and sew each strip.
I had help to make the piping from: Prudent baby and Make it and love it and also from another blog... it was a video with a woman talking with sticks and pictures of heads glued on them, it was funny, too bad I can't find it now :/
3. Sewing the piping
Sewing the pipping

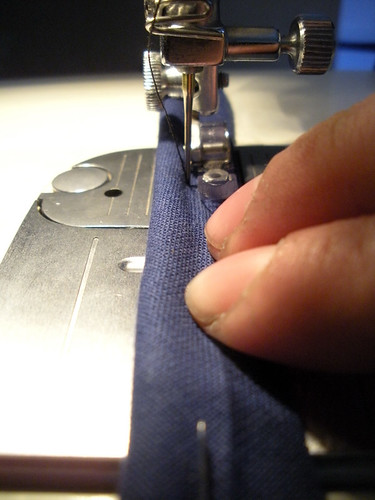
Sew with zipper foot.
Remove the pins as you go and mark with your fingers where the cord is so it's easier to sew.
4. Sewing the piping to the body of the cushion
Joining the pipping to the pieces

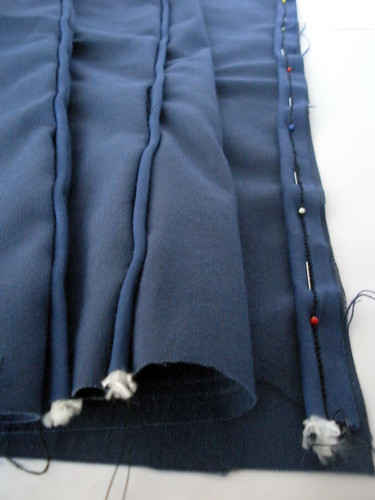
Face right sides of the pieces of the "body" and put the piping inside lining up raw edges, pin next to the cord and sew with zipper foot.

Join A with A, B with B and apply the piping only in one side of C

If you want you can make a zig zag stitch on the edges so they don't fray.

Joining


You will end up with a long piece of fabric and here it shows how the piping is going to be sewn only in one side that will be the back and lower side of the cushion (C)
 5. Sewing the piping to the triangles of the sides
Applying the pipping to the triangle sides

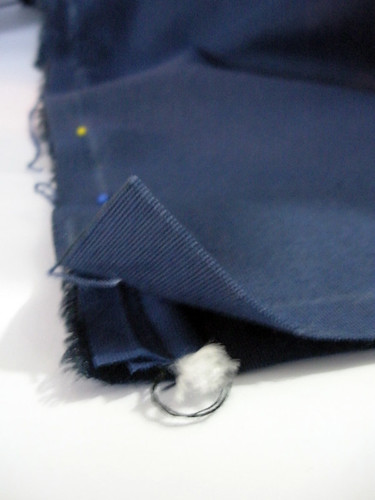
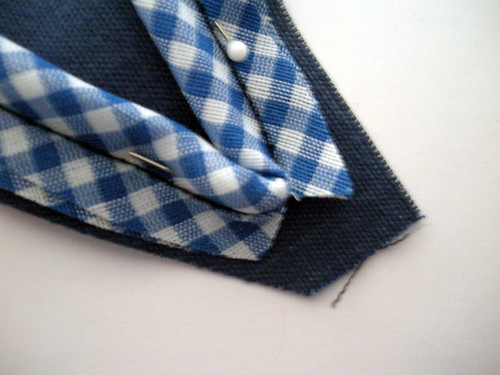
Pin the piping in place, again, line up raw edges and on the corners or angles make a cut so you can bend the piping and keep pinning.
Finishing the triangles

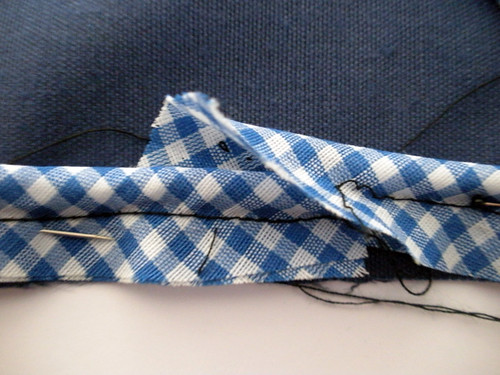
Sew in place and when you reach where you began sewing or pinning, open the seam of one end and cut a bit the cord, insert one end into the other, pin and sew.
6. The final (or not) step: Sewing the triangles to the body
Probably the trickiest part but with patience it can be done.
The final (or not) step

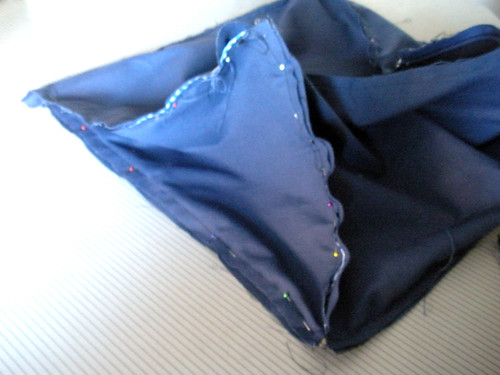
Pin the triangle into the opening, matching the 30 cm side of the triangle with the 30 cm one of the rectangle (B-C) and so on. On the corners try to kind of tuck in the triangle "angle" and once sewn cut the extra fabric.
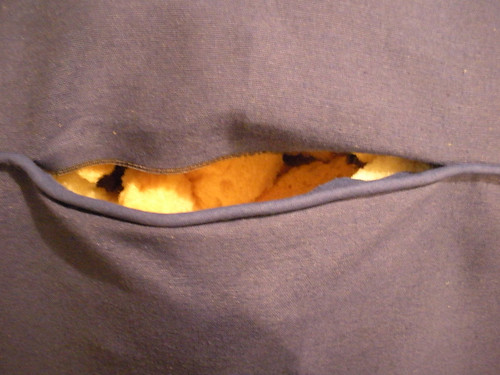
Sew the C side leaving a gap in the middle to turn the cushion right side out and fill.
7, Filling and closing
Filling and closing

Stuff it and hand sew the gap with invisible stitch.

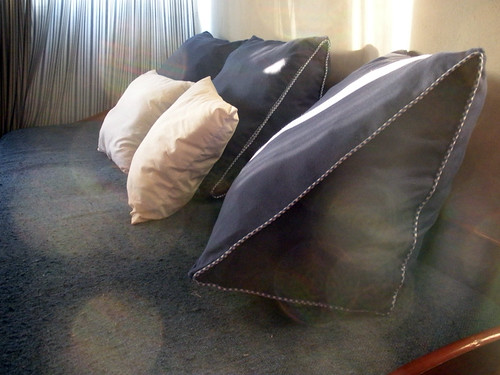
And.... it's done :D
Done!


Photobucket

Monday, August 9

Wee

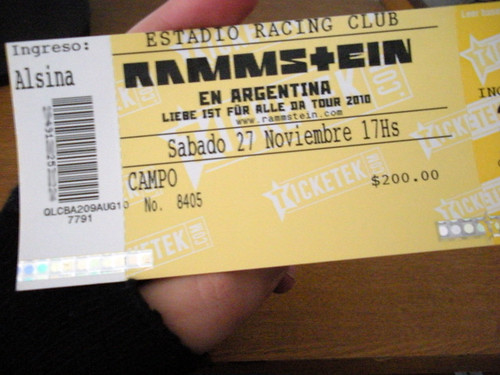
Ticket for Rammstein!

Nun das warten hat ein Ende,
leiht euer Ohr einer Legende
.

RAMM - STEIN!
RAMM - STEIN!
...RAMM-STEIN! :D

Photobucket

Sunday, August 8

Vest to be

Vest to be - mosaic
Photobucket

I know it's late...

... but HAPPY BIRTHDAY Pau!! (although I already said it on text and on your facebook wall but I just wanted to say it here too :D)

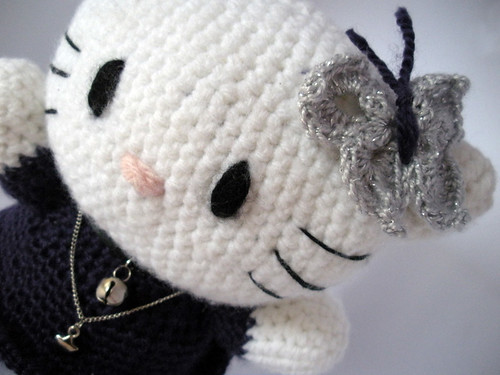
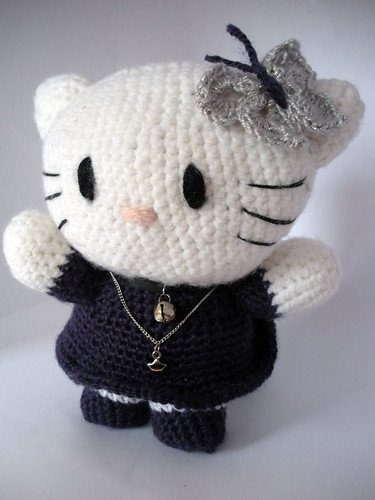
Kitty PauThis is for you... let's say it's not for your bday cos I know you feel awkward with gifts... so this Kitty is just a random gift... actually it is but I've been procrastinating to make it and then give it the final touches, but Im glad it happened, I learned a lot from the first time I tried the pattern :p
I've been busy to take pics or to get things done these weeks, with my dad here and his doctor's appointments and with people working on my apartment, everything was a chaos (but the Goddamn parquet floor is finally fixed! yay!)

I finished this Kitty amigurmi the night before Pau's bday, on the 31st... funny I still have it but I think we will find the time to get together.
I hope you find the resemblance, I made a butterfly pin with this pattern (loved the graphics), added a black ribbon with a little bell and a lil chain with a star embelishment I had on my stash. Hope you like it!

Kitty Pau Rocker
Pattern from here
Photobucket
Related Posts Plugin for WordPress, Blogger...